Battery tester mark 2
So after solving the resistor ballast issue, let's have a look at the battery tester v2.
What are the requirements ?
What are the requirements ?
- Big color screen. Because it is prettier.
- Constant current discharge up to 1.x Amp. We mostly target 500 mA, voltage between 3 and 5v
- Rotary encoder to do the setup
The screen will be a 320x240 ILI9341, you can get them on ebay for ~ 4$
We'll use a STM32F103 micro controller to drive it.
Why ?
Because it is much better than a cheap Atmel based board :
- 64 or 128 kB Flash, 20 kB Ram
- MUCH faster
- Cheap (~ 2$)
- You can actually debug with it, using a STLINK V2 clone or a blackmagic clone.
- The ATMEL chip is too slow to drive such a screen.
- Run at 3.3V, which is perfect for the ILI9341 which also runs at 3.3v on its IOs.
Let's have a look a the constant current circuitry :
The QUCS simulation file is available here on github.
So we just have to provide VREF and the current will be adjusted to follow it.
The simulator output is as follows :
To drive VREF, we'll use a cheap I2C DAC : MCP4725
(at such low price, no need to play with PWM and integrator circuit)
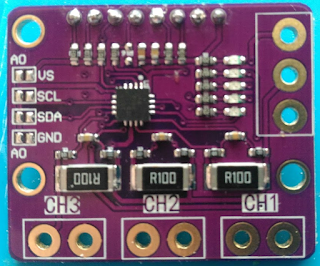
We'll also use a INA219, they are very good to measure voltage and current
and they isolate the input voltage from our circuit completely.
That means. we can put the battery backward without destroying everything.
You'll need some active cooling to cool down the FET
I thought at first we could do without, but the FET will go to 60 degrees in 3 mn and keep climbing.


Comments
Post a Comment