DSO150+GD32VF103: Jtag strikes again

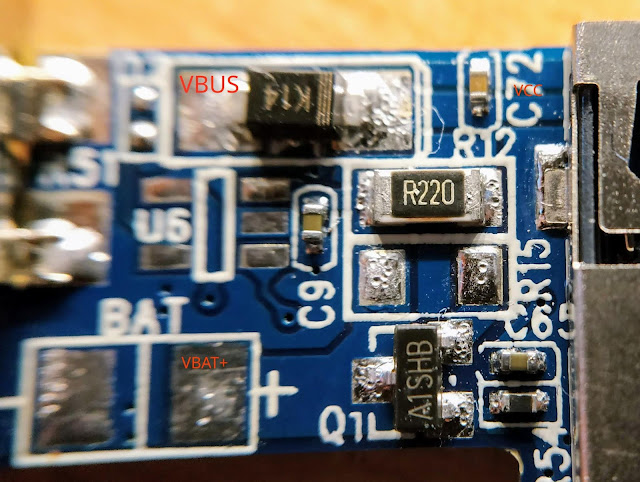
So after doing the small resistor removals, short, wiring etc... we have now PB8 used in place of PB3 and PB3 is left unusued for the Jtag.
The screen driver replaces on the fly bit 3 by bit 8 when writing on the PB port.
After looking into it, it does not need to be optimised, as the code is using one or two colors at a time only. So the conversion is done once at the beginning of a sequence.
The speed loss is really small compared to vanilla code (like 0.5% slower).
At worst we can compute a lookup table and lose 1kB of flash. Not worth it.
Nice, let's display something and for ask the chip ID..... complete failure.
And sometimes, i get a warning from openocd it has lost contact with the target.
Bummer.
I looked at my code, it looked completely correct.
I checked all the involved pins for bad soldering, all checked out ok.
It took me a while to figure that one out (1 full day).
It's the openocd message that gave me a hint.
The chip is configured by default to enable Jtag TDI/TDO/TMS/TCK/RST pins.
Oh wait...
RST ? Ah crap, it is connected to PB4 so it will scramble the low bits of port B and thus corrupt data from/to the LCD.
Let's modify PCF0 to use TDI/TDO/TMS/TCK and *NOT* RST
Success ! LCD is working fine.
On a side note, ifever you messed up PCF0 and lost jtag, you can link JP1 or JP2 on the DSO Shell to force BOOT pin to ground. The chip will then boot to bootrom. In bootrom, you can attach the jtag, reupload the correct code, then remove the soldering point.

Comments
Post a Comment