Upgrading Anycubic i3 mega with SKR 1.3
Most of the "fun" of a 3D printer is to tinker with it.
My faithful anycubic i3 mega was on the old side, the custom touchscreen makes it nearly impossible to modify as far as UI go.
So let's swap the boards. I bought a SKR 1.3. It is cheap, well supported, and using TMC2130/SPI is simple : put the jumpers and done. Not need to rewire/solder anything.
Most of the wiring is simple enough, hint : Z1 is the right one, Z2 is the left one.
But one thing that had me scratch my head for a bit is the 6 pins ribbon.
At first i though it was X*2 pins, Z*2pins, temp *2pins but actually it is not
What i could probe is the following :

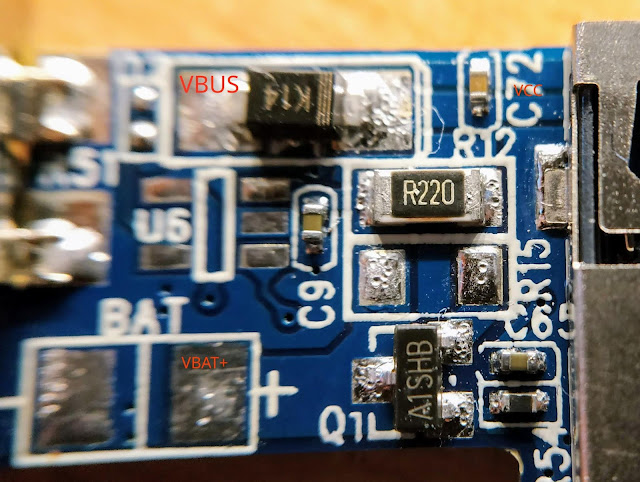
So most of the signals are relative to Black i.e. ground
The simplest is to connect Black to the HotEnd0 Ground pin, and Red to HotEnd1 + pin (~ 3v)
If you dont connect black to something more or less grounded, X, Z & Filament runout switches will not work.
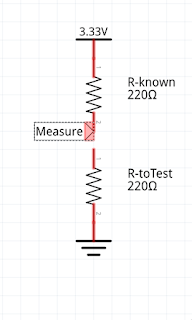
The HotEnd0 pin is not , strictly speaking, ground. There is a small resistance to ground (~ 8 Ohm), but it is good enough for now.
Y & Right Z are not problem, you just have to use a JST-XH connector instead of the original dupont and it's done.
I desoldered the micro JST from the original HUB board and solders JST pairs on it.
NB: For the 2130 / SPI, dont use linear adance, it will not work on the extruder.

Make sure that the Black goes on the LEFT pin of the temperature socket on the picture
Else nothing will work as far as the switches go.
I did not connect filament runout and the "green". Dont know what it is for.
I should have used the same color as the original ribbon, but remember i though they were unrelated pairs at first.

Comments
Post a Comment